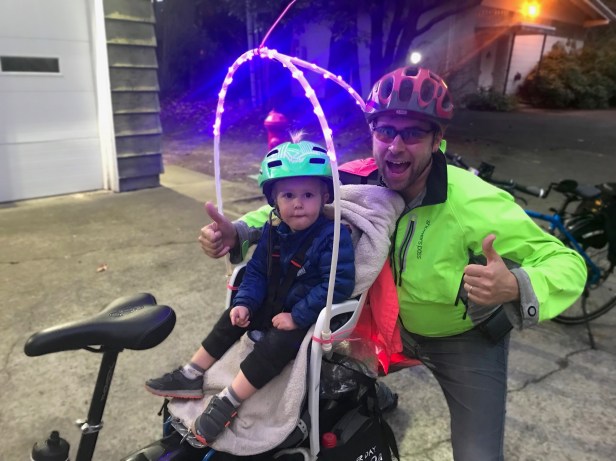
I get asked so often about the DIY rain cover on my kiddo’s bike seat that it’s due time I wrote a blog post about it!
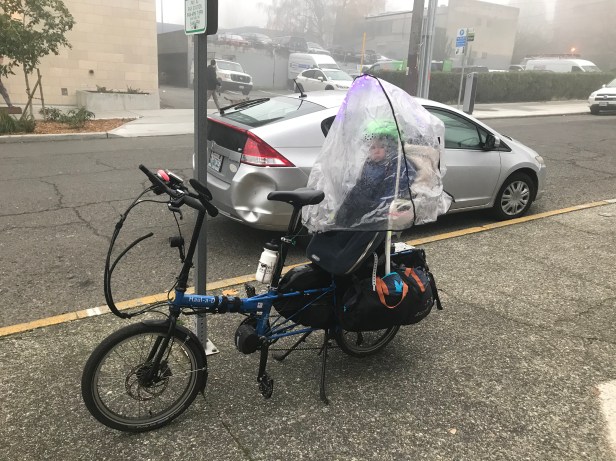
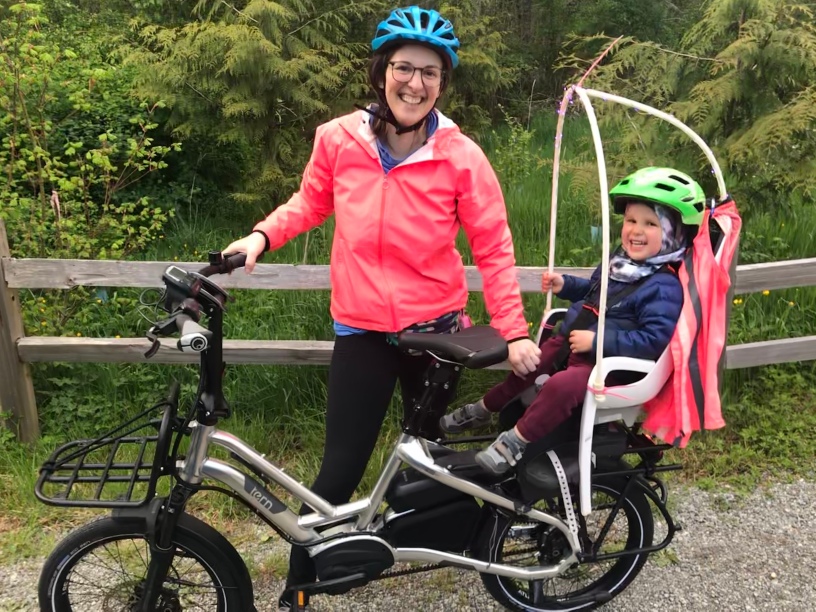
Being a car-free cycling family in the Seattle area, rain gear is a MUST. Some older kids probably do great with simply a big hat, poncho, and that PNW resilience; but for my little guy (now 2.5) the full bubble cover was the best low-hassle choice for his wee self.
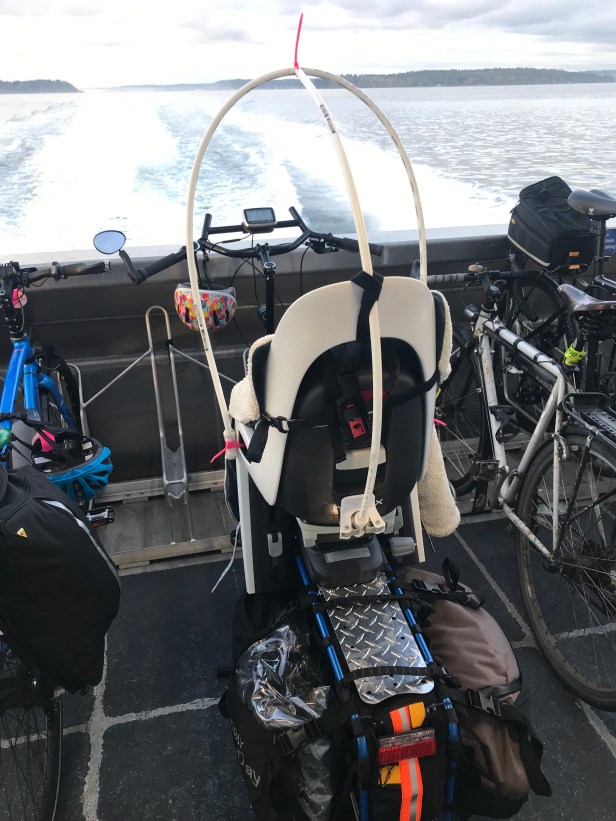
While you could solve the biking in rain with a kid problem straight away with a sweet bakfiets bike (we love our R & M Load 60) — those with a mid- or long-tail bike will find the market sorely lacking in child seat rain covers. My family commutes on the King county Water Taxi several days a week between Vashon and Seattle, and there’s a limit on the length of bike — cargo box bikes are not an option. Thus, my partner has a Bike Friday Haul-a-Day and I have a Tern HSD S+. We use a Hamax Caress bike seat – which we chose for it’s size adjustability and its comfy, suspended ride.
There are only two products on the market that I know of which are specifically for the purpose of rain cover over a child seat like the Hamax, Yepp, etc.
- Maruto cover at $40-60 (no frame)
- Yuba Pop Top Cover at $200 (aluminum frame)
I already had this rain cover for our stroller, so one day we brought the stroller cover with us and rolled the bike into the hardware store. We were inspired by local family-bike pro Genevieve, who made a PVC pipe frame for her Maruto cover. So up the PVC pipe aisle we went to play around with the options that might fit our seat.
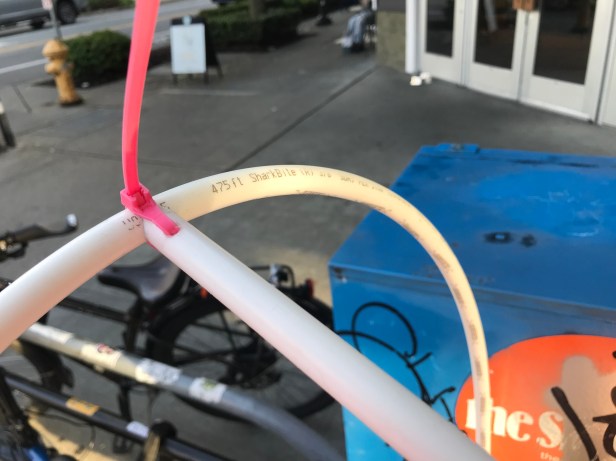
The resulting supplies:
- Two 3/8″ pipes
- Three 3/8″ Sharkbite pipe couplings
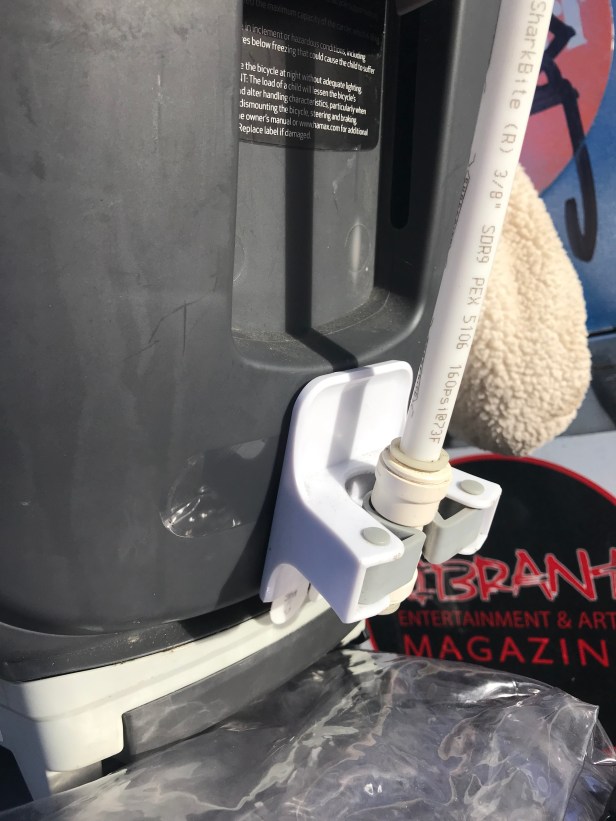
- One Command 3M broom holder
- Zip ties
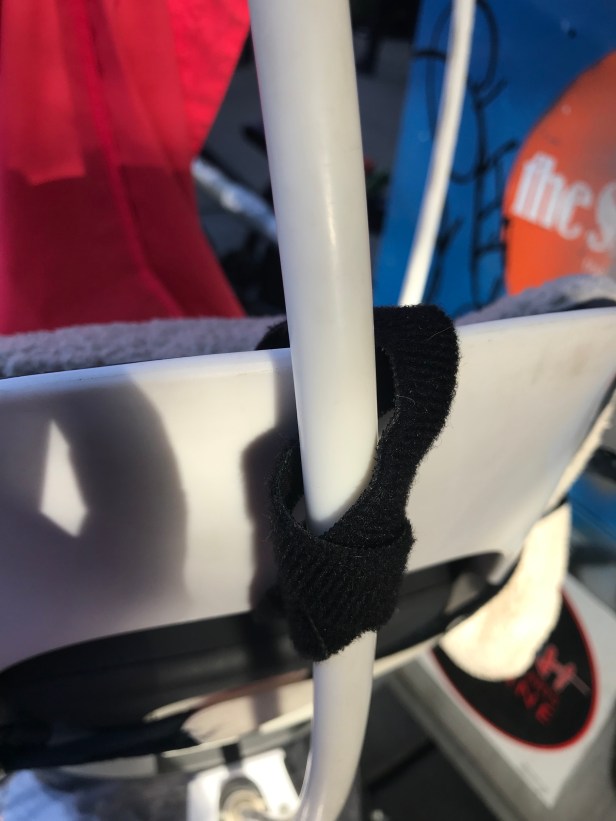
- Velcro
- Grommets
Installation was pretty straightforward:
- Stick the broom holder on the back of the seat and let dry
- Cut pipes to size (I guess you could measure before this step. I’m a “measure never, cut now and deal with it” kinda gal, though)
- Drill a small hole and notch in the end of the pipe which will form a T in order to get the ziptie through
- Put couplings on the ends of the pipes
- Bend the pipes and zip tie things together
- Add velcro to keep the center of the “T” in the middle of the seat-top
- Stick back pipe end in the broom holder on the back of the seat
- Add grommets to the front (optional)
Later I added two grommets in the front and threaded a small rope through. On windy days I fasten that around the seat post to keep the bubble from flying up. (If you’ve ever ridden down Yesler on a bike, you know how much I need this!)
Here are the photos. Happy DIY-ing!!! Drop a photo in the comments if you have a design to share, I’d love to see it!


*Here are the lights we love to put all over our bikes. (No, I don’t use affiliate links)
